
Beer-making kits are a great way to get started as a homebrewer. They save first-timers the headache of acquiring the correct equipment, measuring ingredients, and facing unforeseen kitchen disasters.
However, homebrew kits vary, as does the amount of accurate advice they provide.
The following tips will help save you time and energy during your first brew day. Although this follows the process for a 1- or 2-gallon brewing kit, this guide is relevant for any batch size.
When shopping for your first homebrew kit (or buying one as a gift), remember to go to a trusted homebrew source rather than a big-box retailer. Ingredients will be fresher from a beer-industry business.
Sanitize Everything — Really, Everything
Although most homebrew kits come with sanitizing instructions and sanitizer, it’s best to take this a step further by adding a 4-ounce bottle of Star San, homebrewers’ sanitizer of choice, to your cart. It will run you less than $9 and can improve your beer for this batch and many to come. (It’s only $7 on Amazon right now!)
Second, everything you use to brew should be sanitized. After the wort has been boiled, nothing should touch it or the container it is in without being fully submerged in sanitizer for a few seconds first. (Yes, even your hands!)
Another big miss in kit instructions is not advising to sanitize yeast packets and scissors before pitching yeast into the finished wort. Some instructions mention putting sanitizer inside the airlock, but don’t direct brewers to submerge the airlock itself. This small step can save you from sour beer.
It’s in the Bag
Homebrew kit instructions often suggest putting grains into a bag before mashing. This is known as the “brew in a bag” method and is absolutely the best way to brew a small-batch kit.
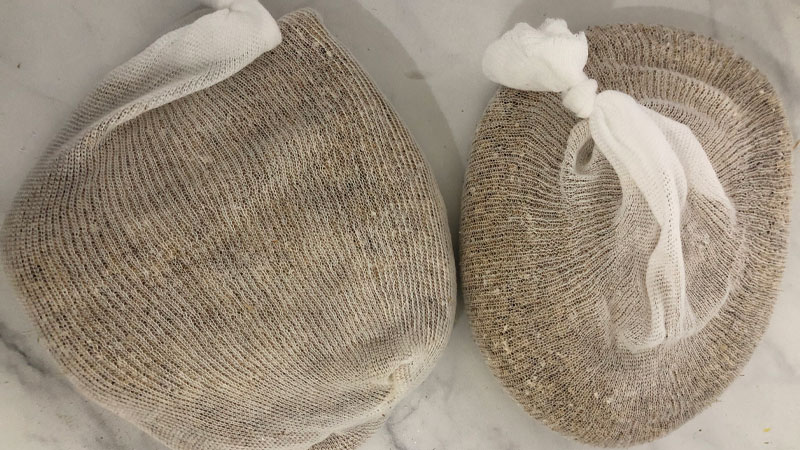
Muslin bags (like these) are available in sets of five or 10, and work great for brewing as well as dry-hopping. Cheesecloth and large spice bags work, too.
When packing your bag, make sure the grain has plenty of room to move around. Mash water (professional brewers refer to this as “hot liquor”) needs to flow between the grains and fully surround them. One bag works fine, but I use two to ensure each grain can enjoy a full soak in the mash.
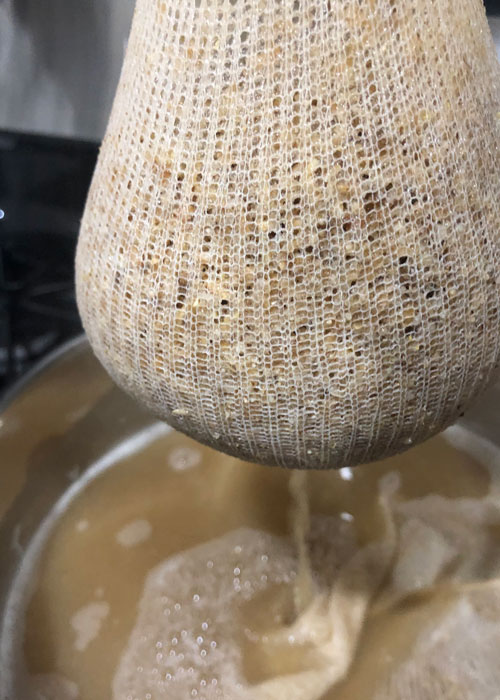
Once your bags are tied, lower them into the pot and stir. Do not harshly squeeze the bag. A gentle squeeze is fine, but you shouldn’t feel like you are wringing it out. Liquid squeezed out of the grain can cause unpleasant tannins in the finished beer.
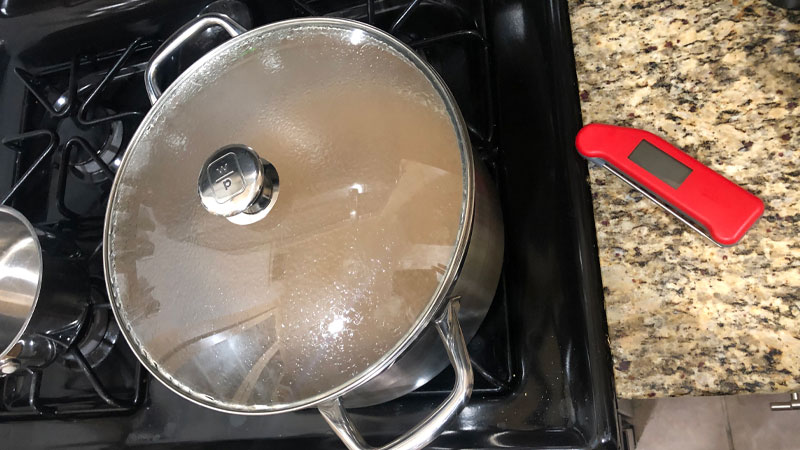
Give Yourself Space, and Put a Lid on It
Several small kits call for a 6-quart pot to boil your wort. To avoid boil-over (and constantly hovering around the stove in a panic), get a larger pot. I recommend at least an 8- or 9-quart pot for a 1-gallon, all-grain kit (which I used for this article), and larger if your brew is larger. Any smaller, and you’re in spillage territory.
Keeping mash temperature consistent on a stovetop is no easy feat. Aim for the 144°F-to-149°F range, where alpha amylase and beta amylase enzymes do their best work breaking down starches into fermentable sugars.
If your mash temperature is a few degrees under, that’s O.K.; 5 degrees over gets risky. Too hot, and you risk denaturing enzymes, which will lead to beer that is fuller-bodied than intended. Remember, too, that you don’t have to keep the burner on for the whole mash.
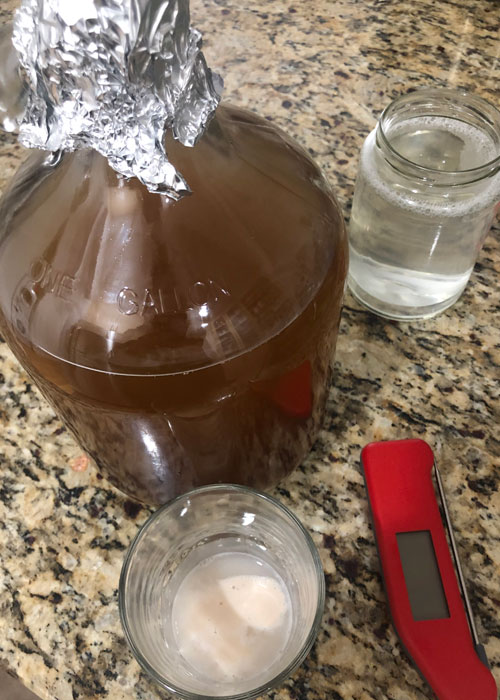
Temperature can be measured with the provided thermometer, but these readings aren’t always clear. If you’re able to step it up, you can get a digital thermometer for $20 or less, or a Thermapen, which is a bit pricier but is one of my favorite kitchen tools.
Finally, kit instructions rarely mention this simple step toward success: Put a lid on it! An easy way to help maintain consistent temperature is covering your pot. If you don’t have a matching lid or larger, try covering the pot with foil.
Mashing in usually takes an hour; stir and check the temperature every 15 minutes.
Fill It and Chill It
After the mash is the boil (if you’re using an extract kit, you’ll start here). This step is sufficiently explained in most homebrew kits.
After the boil, it’s time to chill. Things get a little tricky here, though. Most homebrew kits instruct chilling wort down to 70°F, which is correct, but many don’t specify when or how to transfer the wort from the pot to the fermentation vessel.
This is when your wort is most vulnerable to infection; because yeast hasn’t been pitched yet, any bacteria or wild yeast in the air will have free reign over the sugars in the wort.
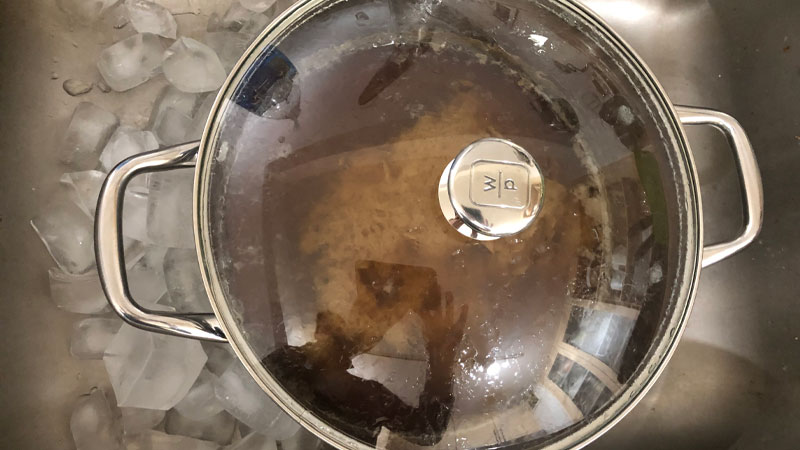
If you have a pot with a lid, chill the wort in an ice bath in your sink until you reach 70°F. (You sanitized that thermometer, right?) Then, transfer the chilled wort from the pot to the fermenter.
No lid, or don’t have enough ice to fill the sink? Cover the pot in sanitized foil and chill in the refrigerator, just until cool enough to safely handle. Then, pour the wort into your sanitized fermenter, using a sanitized strainer, over a sanitized funnel. Cover with sanitized foil. Place the fermenter in a bowl filled with ice.
Wrap It Up
Starting fermentation is your final step on brew day. One easy way to stabilize temperature fluctuation is wrapping a blanket around your fermenter. Don’t let the blanket get too close to the airlock or blow-off tube — remember, sanitization!
Place the wrapped fermenter in your coolest closet or basement (65°F is ideal). Placing the fermenter in a corner will lessen the chance of it shifting or being disturbed.
Like the enzymes during the mash, yeast are delicate beasts, and need a stable environment in order to do the job of turning wort into beer. Imagine trying to work while someone turns up the thermostat 20 degrees, then crashes it 10 degrees every few minutes. That’s how yeast feel when their surroundings shift even a degree or two.
Treat your yeast well, and in a few weeks, you’ll have drinkable beer.